LoliBot Assembly
Contents
- 1 Tools
- 2 Check parts in kit
- 3 Step 1: Install power LED
- 4 Step 2: Install power switch
- 5 Step 3: Install JST sockets
- 6 Step 4: Install IMU socket
- 7 Step 5: Install IMU headers and module
- 8 Step 6: Install Lolin32-Lite sockets
- 9 Step 7: Install Lolin32-Lite headers and module
- 10 Step 8: 2-way pin headers
- 11 Step 9: Fit header jumpers
- 12 Step 10: Attach Lolin32-Lite power lead
- 13 Step 11: Install servo header
- 14 Step 12: Install battery holder
- 15 Step 13: Attach motor leads
- 16 Step 14: Attach motors
- 17 Step 15: Plug in motors
- 18 Step 16: Install reflectance sensor
- 19 Step 17: Attach servo
- 20 Step 18: Attach wheels
- 21 Step 19: Insert battery and connect power
Tools
Your own tools are not required for the Open Hardware Miniconf assembly session, but if you are able to bring any of the following then that would be great.
If you're flying, please bear in mind that sharp items like cutters or multimeter probes will need to be put into checked baggage not carry-on.
- Wire cutters (and wire strippers if you have them)
- Multimeter
- Soldering iron
- Solder
Check parts in kit
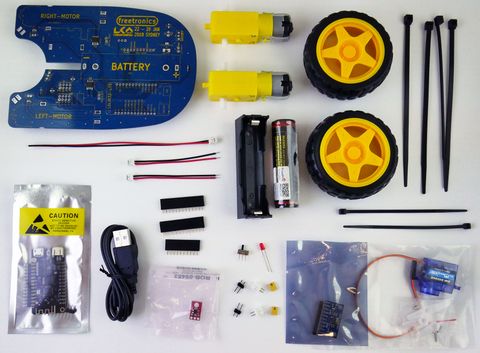
Your kit should contain the following items:
Your kit will also include an extra cable tie and a 3-way 90-degree header, which aren't shown in the picture above.
Please check over the items in your kit, and if you think you are missing something then let us know.
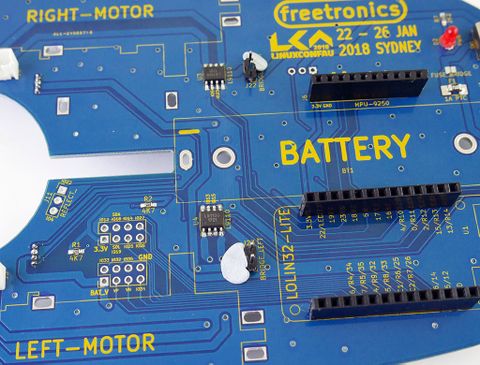
Note that the main PCB already has surface mount parts installed on the top, and three large LEDs installed on the bottom. For the rest of these instructions, we assume the PCB is sitting on the bench with the LEDs underneath as shown here. The "top" is the side with the surface mount parts, and the "bottom" is the side with the LEDs.
Step 1: Install power LED
If this is your very first time soldering, please ask an instructor to help you with this step.
The power LED is a small red part with two leads. It looks like this:
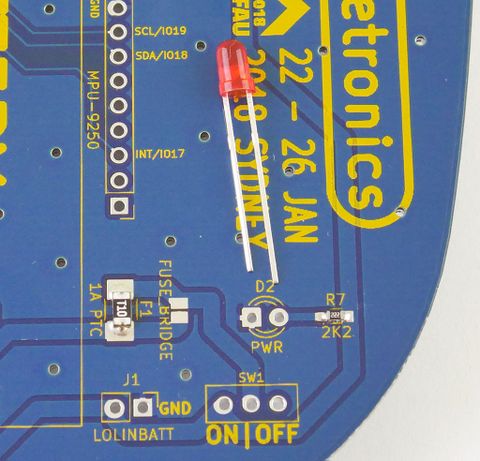
Here you can see it sitting on the LoliBot PCB just near the position where it will be installed between the "D2" and "PWR" labels:
Look carefully at the legs of the LED. You will notice that one of the legs is longer than the other. Also, there is a small flat section on the body next to the shorter leg. LEDs are "polarised", which means they need to be installed the right way around. If you install it backward, it won't work.
Insert the LED into the PCB with the pins oriented as shown above.
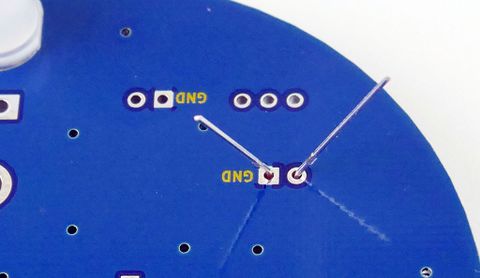
Then hold the body of the LED against the PCB while you gently bend the legs apart underneath the board, so that it is held in position and can't fall out:
When you turn the PCB over, you should see that the shorter lead goes through the hole marked "GND".
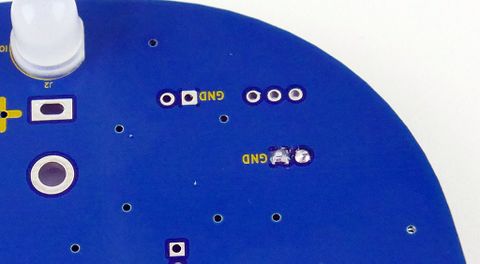
Now, solder both leads of the LED to the pads on the circuit board. Then use side-cutters to trim the component leads just above the solder joint:
WARNING! The leads can shoot off like tiny steel darts when they are cut. Make sure you hold the leads with one hand while you cut them with the other. Don't let them fly around the room, and make sure you collect all the offcuts to dispose of later. Please show respect for the venue by not leaving offcuts lying around on the benches or floor.
Step 2: Install power switch
The power switch has three pins, and mounts just near the power LED. The switch is NOT polarised, which means it doesn't matter which way around you install it. It works the same both ways.
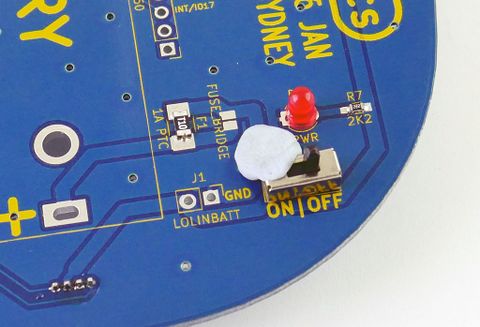
The switch may fall out when you turn over the PCB to solder it, so one trick is to use a little blob of blu-tac to hold it in place:
Step 3: Install JST sockets
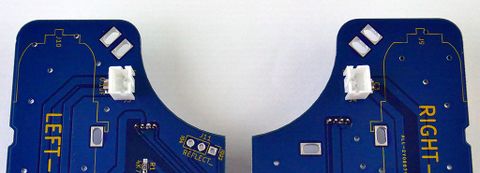
Two JST sockets need to be mounted near the motor locations. The sockets have a slot down one side, so be careful to align them with the slots pointing towards each other as shown in the photo:
Just like the switch, you might find that a blob of blu-tac is a big help keeping them in place during soldering.
Step 4: Install IMU socket
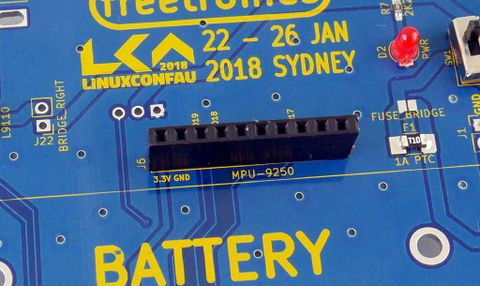
The IMU (Inertial Measurement Unit) is supplied as a separate module that can be plugged into the robot chassis. Insert the black 10-way socket into the PCB as shown, and hold it in place with blu-tac while you solder it from the bottom:
Step 5: Install IMU headers and module
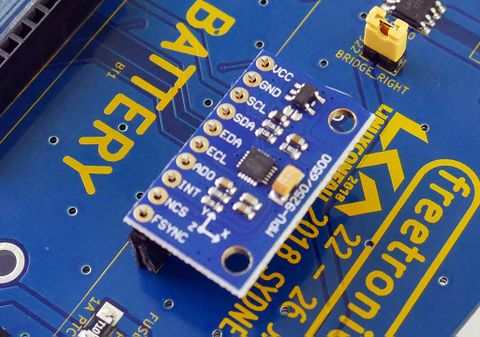
Inside the pack for the IMU is a 10-way pin header. The easiest way to fit it to the IMU module is to use the IMU socket to hold everything in place. The pin header has longer pins on one side and shorter on the other. Insert the longer pins into the socket on the robot, then fit the IMU module onto the shorter pins on top:
Now solder the pin header to the top of the IMU module PCB.
After it has been soldered in place, you can remove and re-insert the IMU module if necessary.
Step 6: Install Lolin32-Lite sockets
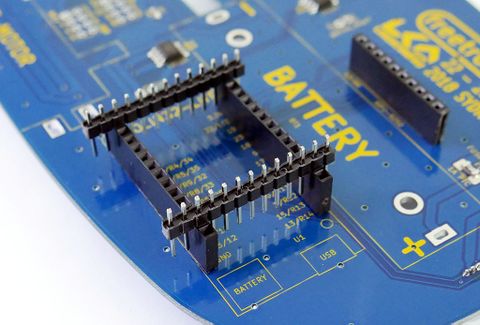
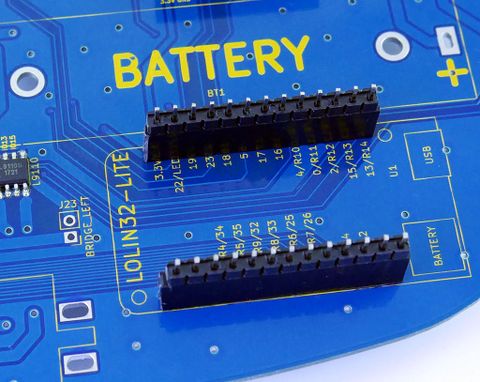
Installing the sockets for the Lolin32-Lite is very similar to the socket for the IMU, and you can do it the same way. A good trick is to use the pin headers for the Lolin32-Lite as guides to keep the sockets aligned. Place the sockets in the PCB, and then insert the pin headers sideways as shown here:
Then solder the sockets in place.
Step 7: Install Lolin32-Lite headers and module
Just like with the IMU, insert the pin headers into the sockets with the longer side of the pins inserted:
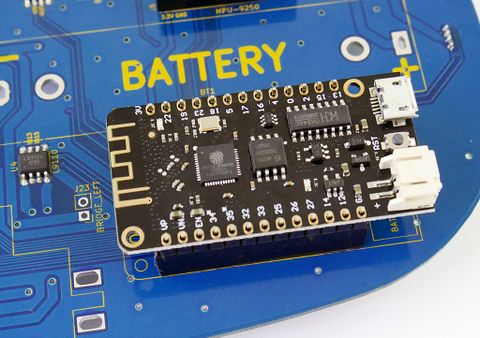
Then fit the Lolin32-Lite onto the pins, with the white JST socket and the silver USB socket on top:
Solder the pin headers to the top of the Lolin32-Lite.
Step 8: 2-way pin headers
Insert the pair of 2-way pin headers into the PCB as shown, and hold in place with blu-tac:
These headers can be a little bit loose, and they may not sit straight in the holes. Try to keep them straight while you are soldering them.
Step 9: Fit header jumpers
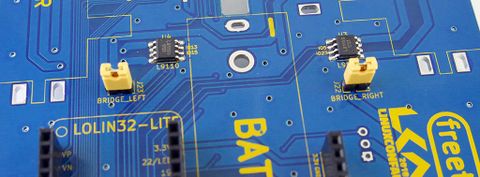
Place the two yellow jumpers onto the pin headers you just installed:
Step 10: Attach Lolin32-Lite power lead
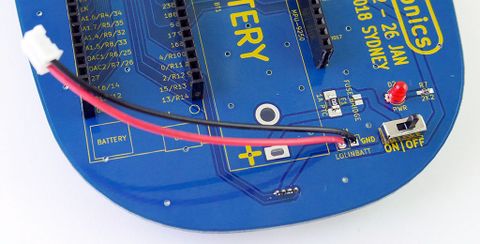
In the kit there are three red/black leads with JST plugs fitted. One of them is longer than the others. This is the power lead for the Lolin32-Lite. You can install it as supplied, but it's longer than required to reach the Lolin32-Lite power socket so you can cut it shorter if you like. Check the photo below to see where it will go:
IMPORTANT: This lead is the reverse polarity to the other two JST leads, so don't get them mixed up if you cut it shorter!
If you cut the lead shorter, use a pair of side-cutters to trim about 5mm of insulation from the end of the wires. Then twist the tiny strands of wire together, then use the soldering iron and solder to "tin" the leads, which means to apply some solder without attaching it to anything. This keeps all the strands joined together and helps you solder the wires to the PCB.
Step 11: Install servo header
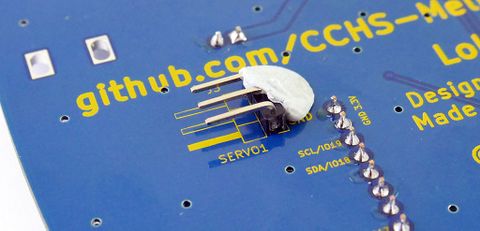
All the parts that you have installed so far have been on the top of the PCB. The servo header is the small 3-way pin header with a 90-degree bend, and it needs to be installed from the bottom of the PCB instead. Turn the PCB over, find the markings to show the orientation, and insert the shorter end into the PCB.
Blu-tac is a great way to hold it in place while you solder it from the other side:
Because it is bent at a 90 degree angle, the header will sit parallel to the PCB.
Step 12: Install battery holder
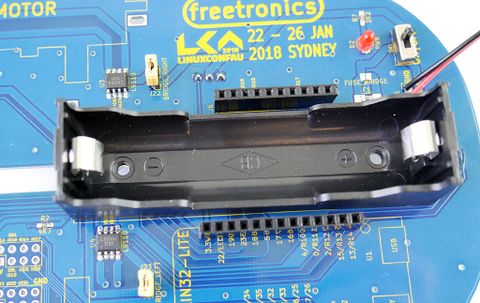
IMPORTANT: The battery holder can physically fit either way around, but it's critical for the battery to be installed with the correct polarity. If you look carefully inside the battery holder you will see little "+" and "-" symbols moulded into the plastic. Make sure you orient the holder so that the + and - symbols match up with the markings on the PCB, then solder it from underneath:
Step 13: Attach motor leads
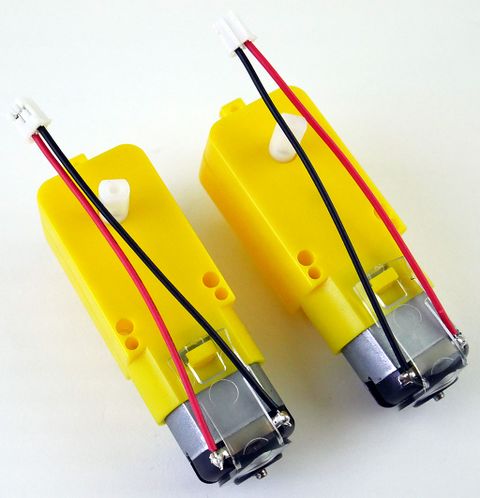
The two shorter red/black leads with JST plugs are the correct length for the motors. Place the motors on the bench as shown below, and use the soldering iron to tin the little tabs on the motors. Then lay the leads on top and solder them to the tabs:
IMPORTANT: In the picture you can see that the leads have opposite orientation. This is to ensure that the motors both turn in the same direction when they are attached to the robot.
Step 14: Attach motors
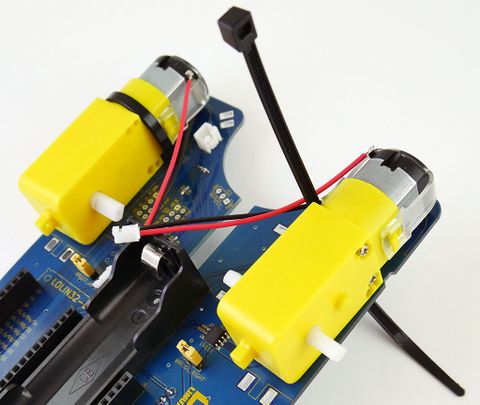
Place the motors against the PCB in the position shown below. Make sure they both have the red lead at the top, and the black lead at the bottom.
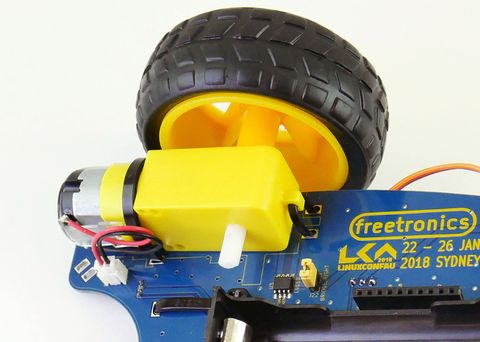
The motors are attached to the LoliBot chassis using two cable ties each. A large cable tie goes around the body of the motor, and a small cable tie goes through the tab on the back of the motor:
Step 15: Plug in motors
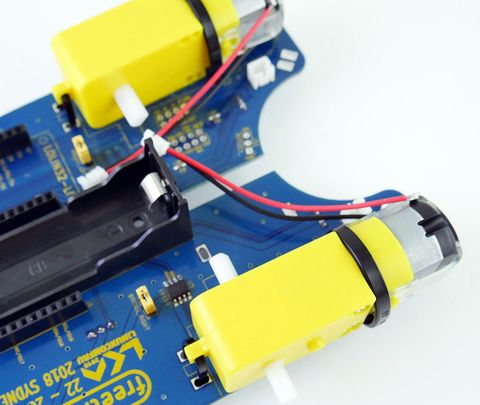
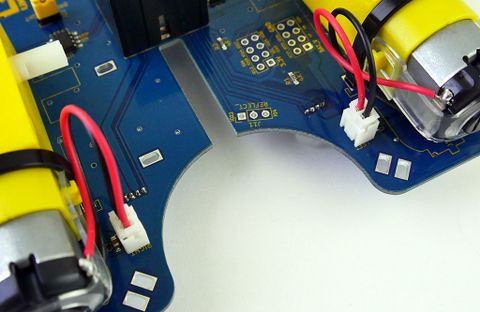
The motor leads plug into the JST sockets next to each motor:
Step 16: Install reflectance sensor
This is where you get to experience the joy of working around design mistakes! Unfortunately the pinout on the PCB is for half of a Freetronics reflectance sensor, but we sourced a different type of module instead which has a different pinout. That means you can't simply connect the reflectance sensor module directly to the PCB as we had planned.
Instead, you need to connect 2 of the pads with the module offset to one side, and then use a jumper wire for the third pad. We didn't have this sorted out by the time the kits were packed, so the parts you need for this step are not included in the kit. Don't bother looking for them! Instead, come to the front of the room and we'll give them to you.
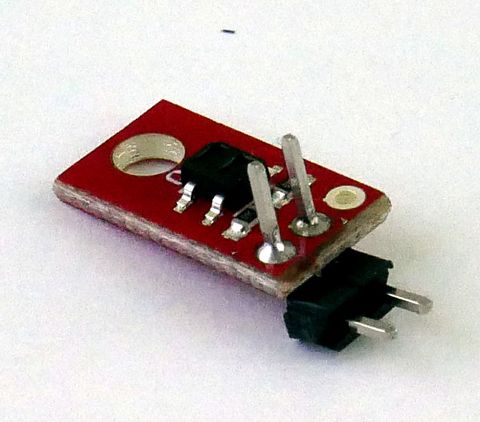
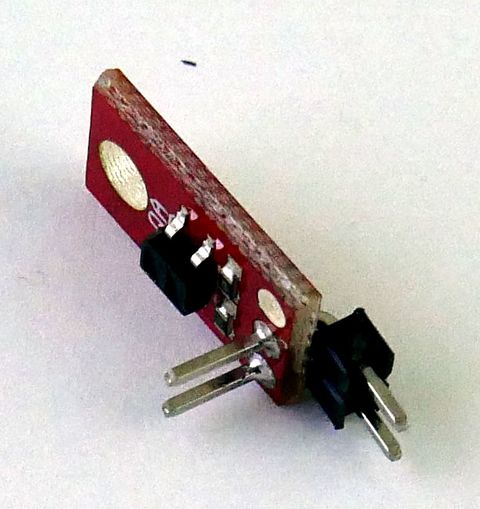
Begin by inserting a 2-way 90-degree pin header into the reflectance sensor as shown here, being careful with the orientation of the long and short pins:
Then cut off the extra length from the long pins next to the solder joints on the module.
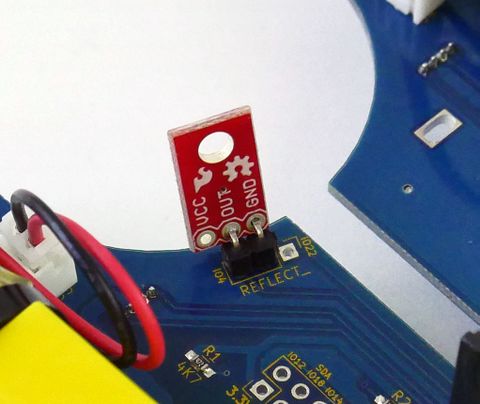
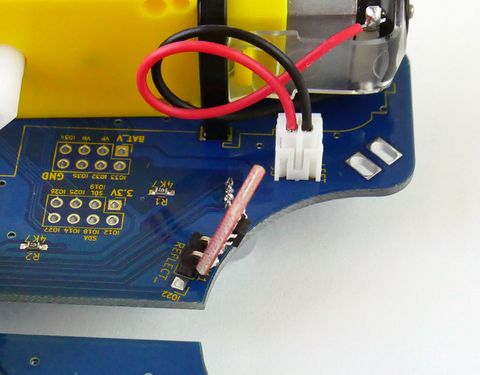
Insert the module into the robot chassis, with the module offset to one side as shown here:
Solder those two pins in place. If you can manage it, try to angle the sensor forward a little like this:
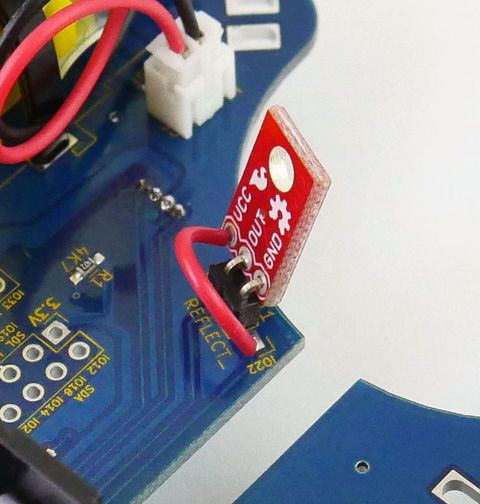
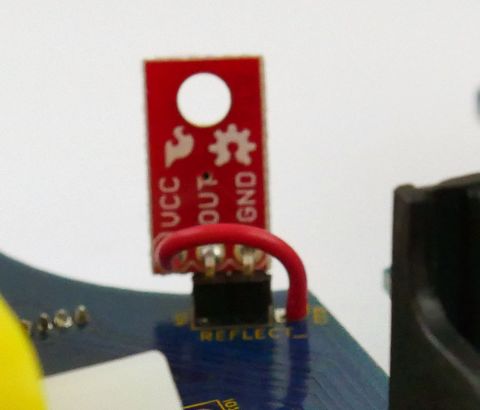
Use a short piece of jumper wire to make a link around the back of the module, between the VCC pad of the module and the chassis pad closest to the slot:
When looking at the module from the back it should be connected like this:
Step 17: Attach servo
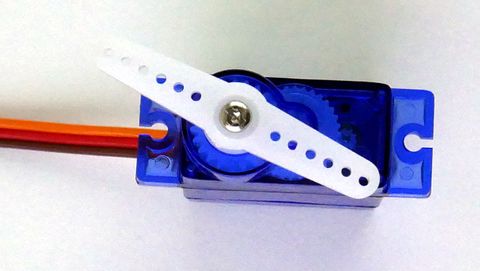
Press the long symmetrical servo horn (the white piece of plastic) onto the top of the servo, and use the smallest screw to attach it. Don't use too much force on the screw because you can break the plastic.
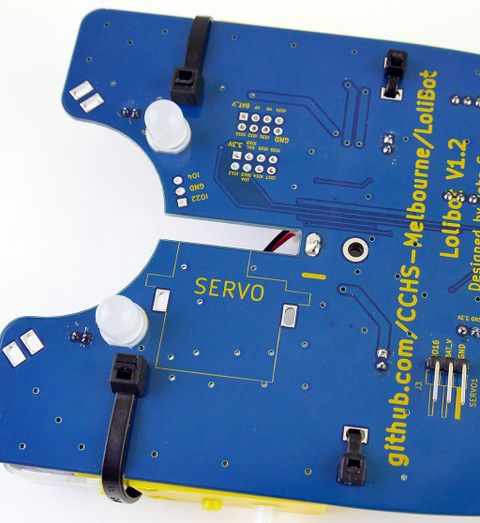
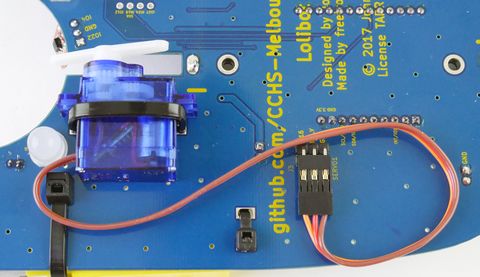
Place the servo on the bottom of the chassis, and hold it in place with a cable tie so that the horn aligns with the slot in the chassis.
Then loop the cable around and plug it into the servo header:
Note the orientation of the connector. The brown lead is GND, red is VCC, and orange is signal.
You should be able to get the cable to sit flat against the PCB. If it doesn't want to stay in place, you can use some hot glue to attach it. We have a few hot glue guns to share.
Step 18: Attach wheels
The wheels are a tight press-fit onto the motor axles. Hold each motor while you press on the wheel. The hole in the wheel has flattened sides to prevent it rotating on the axle, so make sure it's aligned correctly before pressing it on.
Step 19: Insert battery and connect power
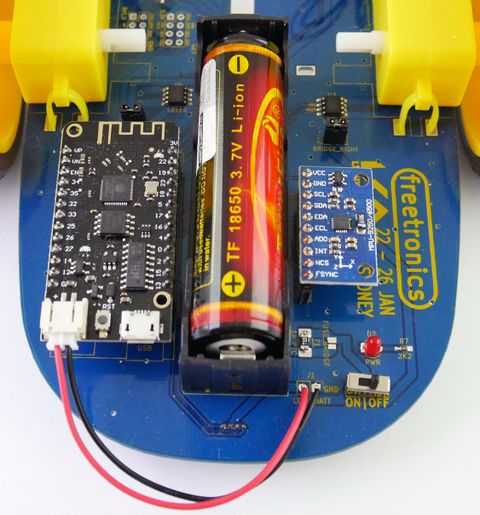
Remove the clear plastic wrapper that covers the terminals of the battery, and insert the battery into the battery holder.
IMPORTANT: Check the polarity symbols on the battery and make sure you insert it the right way around. There's nothing stopping you from installing it backwards, but then very bad things might happen, so don't do it!
The battery fits VERY tightly in the holder. It will take some force to insert it properly. Be careful that the holder pins are not being squished under the battery as you press down.
Plug in the Lolin32-Lite and the IMU module if you've previously removed them, and insert the power lead into the Lolin. The power leads have all had their red and black wires swapped before they were put in the kit, so they should have the red lead to the left and the black lead to the right like in the photo. If it doesn't, STOP and check with one of the organisers before connecting any power.
You're done with the hardware assembly! The Lolin32-Lite needs software installed to control your robot, so the next step is to proceed with software setup.
