Swagbadge2021 GettingStarted
Contents
Getting started with the Swagbadge
Support
- The Swag Badge Spectrum chat is a place where the badge team hangs out, ready to answer your questions.
My package arrived in the mail, first steps.
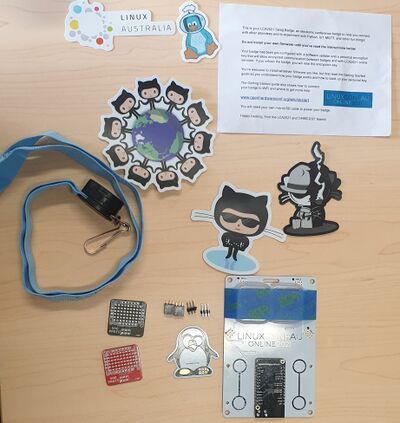
- Your package should contain your badge, and some other goodies!
- Take off the protective cases to reveal the screens.
- Powering it up
- Insert a micro USB cable into the badge and connect the other end to a USB port on your computer or USB power source.
- A green light should glow on the rear of the board, and a title appear across the two screens.
- Turning it on and off again
- Plugging/unplugging it is fine. Usually the badge isn't running anything intensely enough that just unpowering it would cause a problem.
- On bootup, you should see:
- The OLED screens will display "Aiko" and a version number as a title
- It will also display something else to tell you to set up your wifi.
Getting it on your network
Safety precautions we have provided
- When using any hardware ordered off the internet, you can't be quite certain what software might be present on it. Before shipping these badges to you, we reflashed a fresh copy of MicroPython onto the Lolin32.
- The framework running on the badge is Aiko, which is open source.
- The software on the badge is available on the CCHS repository, also all open source.
- The badges are designed to communicate over MQTT - a lightweight standard for messaging on IoT devices, but we are aware of privacy considerations: you don't want anybody able to control your badge from afar. The swagbadge protocol provides support for encrypted messages.
Getting the device on your wifi - wireless
- The first time you boot your device, it won't know how to talk to your network. If it can't detect a pre-existing set of network credentials, or connect to anything it knows about, it will establish a temporary access point and prompt you to navigate to it to enter your wifi details.
- Note: Your device can only talk to a 2.4GHz network: it is not compatible with 5GHz WiFi.
- The screens on your badge will say:
Configure WiFi: aiko1234a12341234. Try http://192.168.4.1 - Use your phone or computer to connect to the wifi network on the badge. Its name starts with
aikofollowed by some numbers/letters. - Once you're connected to the badge, open a web browser to the IP address on the screens. Something like
http://192.168.4.1 - You'll be prompted to enter your wifi SSID and wifi password.
- Once you've saved that, the badge will restart using the credentials you've provided and it will shut down its wifi access point.
Note: If you are using an Android device to link the badge to your WiFi, it will pop up a dialog to say you are switching to a network that doesn't have Internet access and ask if you want to switch back. Select "Keep" to stay on the badge's temporary access point.
Getting the device on your wifi - commandline with mpfshell
- If setting up via the wifi AP (access point) doesn't work, you can put a configuration file onto the badge.
- You'll need to start by getting a copy of the aiko firmware, and installing mpfshell
- Note: Your device can only talk to a 2.4GHz network: it is not compatible with 5GHz.
- Edit aiko_engine_mp/configuration/net.py and insert the details of your SSID and password.
- use mpfshell:
mpfshell -o COM3 -
put configuration/net.py configuration/net.py - fire up repl to view the console log
- You can now restart your device
- On bootup it should now talk to your network and you can see it on the console log.
On bootup you should now see...
Running pre-installed applications
Aiko's minimal Swagbadge application
At the moment the badge by default a basic "Swagbadge" application within the Aiko framework. This application
- has a thread to keep wifi running,
- has a thread to stay connected to (our Australian, private) mqtt server
- has a thread to display a rotating header across the two oleds.
You can now talk to your badge using MQTT messages.
Running other applications
At the moment, "swagbadge" is the only application that's for use with the badge.
There are other applications in the repo which are for other places the Aiko framework has been used.
If you've written an application of your own and want to run that by default on badge startup,
- edit your local copy of configuration/main.py and change the value of the "application" to point to your new application.
- using mpfshell, 'put' configuration/main.py and applications/your_application.py onto the badge
- Restart the badge
Running example code
There is example code which has a number of examples in it, including a snake game and a demo of how to use various badge functions.
- From your commandline on your computer, use mpfshell to put whatever example code you want onto the badge.
- To run example code, you can use the "emergency stop" function to halt any other applications and put you in the repl.
- Touch both of the bottom spots on the sliders
- Reboot the badge
- Now at the repl prompt, type (replace the name of the module as appropriate for the code you want to run):
use examples.game_snake as eg
from examples.game_snake import run
run()
Use ctrl-c to halt operation and return to the repl prompt.
Extensions: Adding a SAO
- provided by others
- build your own (linky here to our docs)
Extensions: Updating the software framework
Between when we ship the board and when it arrives, there might be some changes to the software framework (Aiko). Here's how to update it. Or perhaps you're interested in writing your own applications?
